
The dual battery project is progressing along after hours this week. With the rain we've had this week (around 140mm in the 24hrs to this morning - most of that between 4pm and 10pm last night) I've not felt like cracking out the grinder and doing the metal work to adjust the cradle. So I've been working inside (mostly) on the rear power distribution and control panel. That's the almost-finished unit you see above.
Why is it a funny shape, you ask? Well, the story goes like this...
Pathfinders have a rear cubby storage space in the cargo area:

That it's there - the cover clips off and opens up to reveal...

A convenient little storage spot for things that you want with you, but don't want rolling around the back of the car constantly.

In our case, that's the pair of ratchet tie-down straps, my Kingchrome multi-tool, and our foldable shovel (never know when you need a shovel!). Cleaned out...

... you can see there's quite a bit of room in there - it's quite deep. And there's the trap-door on the floor of the cubby hole which opens into another little storage area. But we'll have to learn to do without that spot, because the grand plan is something like this:

The power panel hidden inside this storage spot. That way, through the week we can have the cover locked in place, and you won't even know it's there. Then, when we go away, it's a simply matter of opening the cover and everything's all layed out and ready to go. A pair of cigarette lighter sockets, a pair of Anderson PowerPole connectors, a volt meter that's switchable between either the MAIN or AUX batteries, and the main switch panel which includes individual fuses for each circuit.
The plan is to have each of the power sockets at the bottom switched through their own individual switch. Not only does this mean they'll each be individually fused (good for safety), but it also means we'll be able to turn things on and off without needing to unplug and re-plug things all the time. Hopefully this will keep the connectors themselves in good condition for longer (and thus less likely to rattle loose down the track). We have used the 6-switch panel, which leaves us 2 switches spare for future use. One idea is to mount a waterproof cigarette lighter socket up on the roofrack, so that when we're camping we can plug in a 12v LED light outside the car without needing to leave the car unlocked/open all the time.

Hopefully it will work as well as we have planned, and give us safe, reliable power whereever we are! And because it's neatly tucked away it won't look out of place through the week, and it won't affect resale value when we come to sell the car. And the best bit is that either through the week, or when we're on the road, because the cover will be in place, nothing will be able to fall against the switches and accidentally turn something on (bad if it's a water pump) or off (equally bad if it's the fridge!)!!! That's what we call, in the business, Win-Win!
The panel itself is made from 3mm MDF board. I initially wanted something a bit stronger, and was going to use ply in around a 4-5mm thickness. When we went to bunnings, they didn't really have anything suitable - it was either 3mm (too thin) or 6mm (too fat). The thin stuff was easy to work with, but bent easily. The thick stuff was strong, but I thought I'd have trouble trying to get board that think into the small hole I was working with.
In the end, I walked out with a big sheet of 3mm MDF. Previously I'd spent a couple of nights measuring the dimensions of the cubby hole, and had made a template out of cardboard which was an exact match for the space. Once I had the MDF home it was a simple matter of tracing the cardboard template onto the MDF and cutting it out with the jigsaw.

Once that was done, I cut a couple of reinforcing strips of MDF, and glued them to the back-side of the panel with PVA wood glue. It was left to set/cure for 24 hours with a stack of bricks and a bag of cement sitting on it - I don't think we'll have to worry about the strength of the bond. The small round holes for the cig lighters were drilled out with a spade bit, the large round hole for the volt meter came courtsey of a hole saw, and the rest were a combination of drilling and a hand-held hacksaw wood blade. Everything was cleaned up with my new file and then sandpaper.

After a lot of fine tuning and slowly extending the holes with sandpaper, everything finally fitted! It was almost starting to look like I'd imagined it would.
MDF's good to work with (beware of breathing the dust though) - it's nice and light and strong. But it's kryptonite is water. If any water gets anywhere near it, it will swell up and disintegrate, much like old-style particle board would. Anyone who's ever lived in a house with an old kitchen will know the fun of swollen doors and drawers that are falling apart. Now this panel will live inside the car, so it's not likely to have any water near it. But it will be used while we're camping, so we're liable to be wet or be out in the rain when we want to use it. In an effort to make it lasst a bit longer, I gave it a quick coat of paint.

Pretty blue paint. Hey - it was all I had on hand in the shed. Not sure why I've got a pressure can of bright blue paint. But hey - I wasn't about to waste some of my precious black spray paint on something I won't ever see - I use that stuff all the time! This blue paint was just begging to be used on something. MDF is very "thirsty" wood, so you've often got to give it a number of coats before you get good coverage. Eventually though we ended up with a cood seal on all sides, including the edges.
You can also see the area on the switch panel that used to have the switch functions printed on it. Nice, relevant thigns liek "Bilge Pump", and "Mast Light". Not surprisingly, I don't currently have much need for a mast light (although I've got to admit that the bilge pump could come in handy), so I masked that area off and hit it with some flat balck Fiddly Bits at the same time. Ahh - good ol Fiddly Bits - it there anything it can't fix for $2 a can?
Then it was in to Matto's Automotive Trim Shop, aka the dining room table. I had a large piece of grey vinyl that I've carted half way around this country. I just knew it would come in handy some day, and yesterday was that day. I cut off a good rectangle (after discovering that some rats, at some stage over the last 8 years, had found it tasty), and gave it a good coating of spray-on contact adhesive. The front of the panel received a liberal spray as well.
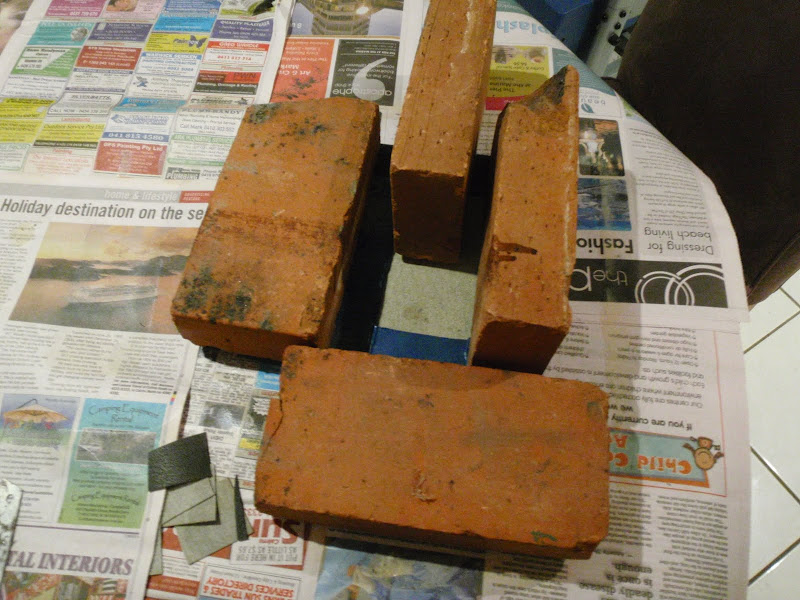
Once the glue had gone tacky, it was time to gently position the panel face-down onto the vinyl, gently smooth it all out, and then pile on some bricks to get a nice finish and a good bond.
Jess was, surprisingly, less than impressed with my chosen work site.
That set overnight and all day today, so this evening it was a relatively simple job of trimming the vinyl and glueing it around the edges and onto the back. Once that had starte to set, I got to work with a sharp stanly knife and cut out the holes on the front so we could start mounting all the hardware. And voila, that's where we're up to now!

The next step is to start wiring up this mess...

...into something that will work! But that won't be too hard - at this stage I'm hoping to tackle it tomorrow night and get it done and out of the way.
I've also got to work out how to actually mount it in the cubby hole - something that thus far I've consigned to the "too-hard" basket whenever I've thought about it. The gold solution would be some captive nuts welded to some ali anglemounted behind the panel, and we can just bolt through the panel to that. But I can't weld aluminium. Next best would be to get a nutsert tool, and put nutserts into some ali angle, and just bolt through to that. But I don't have a nutsert tool (much to my disappointment - I've been after one for years!).
So I'll need to mull over this for a couple of days and see what I can come up with. It needs to be easily removable (away from home with basic tools, if need be) in case I need to get to the wiring for any reason. But it needs to be secure and not able to rattle free. And it needs to look good and continue with the fit and finish of the car - no sense trimming up a nice panel and then ruining the effect by using a couple of roofing screws on an angle into the side walls just cause it works. Hmmm - an interesting problem to be sure.

No comments:
Post a Comment