When we left off last time, we had the bullbar painted and ready to be fitted. Before it could go on, though, a lot of stuff had to come off! We backed the Pathfinder into the rear of the carport, and set to work.
One last look at the factory bumper:


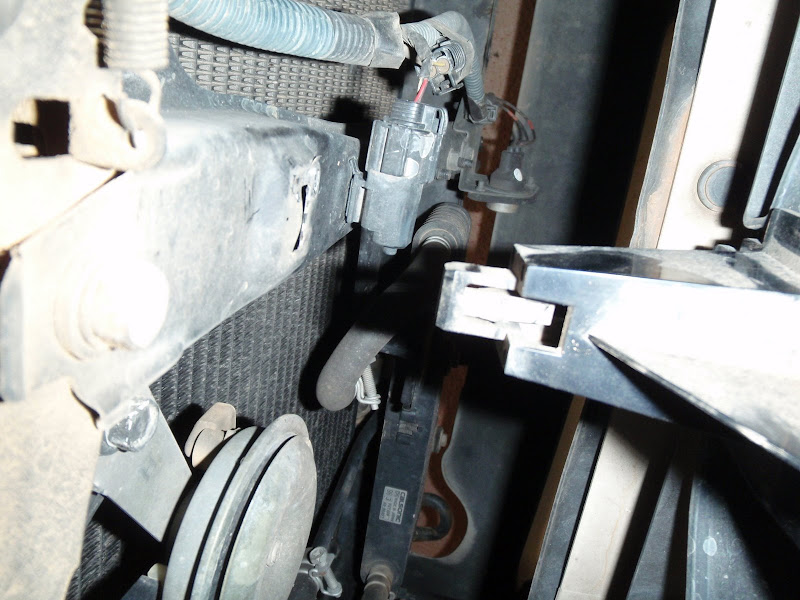
Looking through the bumper, we could see the final bolts that we'd need to get to:

So - Step 1 - remove the inner guards from the wheel wells. I started off by simply removing the screws along the outside and bending the guard out of the way. But that was a real pain, and we ended up having to completely remove both guards anyway further down the track, so save yourself some time and do it properly to start with.

Step 2 - remove the indicators. The indicators are located by a bolt through a tab up the top, but the bottom presses into a push-on connector. So to get it out, once you've removed the top bolt, you need to apply the force as close to the lower connector as possible. We achieved this by using a small flat-head screwdriver to gently lever the indicator away from it's backing bracket - very careful or else you can crack the main headlight or break the mounting. It's not a great system, but it works well enough if you take you time and move gently.

Step 3 - Once the indicators have been removed, unclip them from the wiring harness and store them somewhere safe where you're not likely to trip over them. The next piece to be removed is the plastic trim underneath the headlights. You can see in the photo above that the outside ends are secured with a bolt. Remove the bolt, then slide the entire piece of trim towards the outside of the car, and it will neatly unclip. DON'T expect this to be a push-on type clip, and pull/lever it straight backwards. That works (how do you think I got the first one off??? :) ) but it's not good for it and could easily break things.

Obviously repeat the same procedure for the both sides.
Step 4 - Remove the centre grill. Another step that's quite easy if you know how, and if you take your time. The centre grill is held on by 5 push-on clips - one on each corner, and one in the centre.

The corner clips can be uncliped by squeezing the back sides with a pair of pointy-nose pliers until you can pop them back through the hole. The centre clip has a push-tab in the middle which you push down on with a screwdriver blade to release it.
Once he's undone, store him somewhere safe.
Step 5 - Remove the plastic bumper. The bumper is held on by push-clips along the front, both under the bumper, and on top (under where the centre grill was). There are also some screws and bolts in the wheel arches, but they should have been removed when you removed the inner guards. The trick to the trim clips is to use a small flat-head screwdriver (or two, if you can get them) to slowly work the central locking pin backwards. Once it's pushed out, you'll be able to remove the clip from it's hole. But be careful, it's very easy to ruin them:

That central piece should be round. Every time I tried to lever it up, another piece of plastic would break off. The two clips that are on the underside of the bumper were very difficult, and both were pretty much wrecked. The ones on the top, however, came out fairly easily. Whether that was due to them being less exposed to dirt and mud, or simply that my technique had improved, I can't say.


Once they're all out, you should be able to lift off the plastic bumper and put it safely away to one side.

Step 6 - Remove the metal bumper bar. The metal bumper bar is held on by the two bolts (well, technically there's one bolt, and one nut - the second stud didn't have a nut on it) we saw earlier through the hole in the plastic bumper. It's simply an easy job of removing them, and then the bumper will slide out forward. because of the design and how the bumper bracket slides onto the studs, you don't need to balance one end whilst you undo the other - simply work your way around the bolts, and then slide him off!

Looking very naked now:

Step 7 - Remove the washer bottle. It became obvious about this stage that to fit the brackets for the bullbar, we would need to remove the factory recovery points. To get at them, we needed to remove the washer bottle, as it was covering the last bolt on the driver's side recovery point. If you unclip the lines from their holder on the back of the reservoir, and gently twist and turn it, you can get the washer bottle out whilst leaving it still connected to the water lines, which greatly simplifies things. You'll need a bucket handy to rest it on.


Step 8 - Recovery points. You can see here how the new brackets use the recovery point mounting holes. The bracket shown here is actually the wrong one (other side), so don't pay any attention to that (funny story there too).

Fortunately the recovery points are fairly easy to remove. Give all the bolts a good soaking in WD40 or similar before attempting to undo them, as they're in rather tight. In particular, give the bottom bolts (the ones underneath the car)a good soaking - from both sides if you can get the nozzle of the spray can around there. The bottom bolts gave me a fair bit of trouble, as 10 years of mud, water and general slop had caused them to be stuck in pretty tightly. But after an hour and a half of repeated soakings in WD40, they cracked loose and backed straight out.

Unfortunately what this means is that I've now lost my front recovery points, since the bar did not come with replacement points. So I'll need to get down to TJM or someone and find out if they can make me some custom points out of high-tensile steel.
Once you've go tthe recovery points off, you need to remove the little bumperettes that are mounted in front of them, since that's there the new brackets will be sitting.
Up until this stage, things had been fairly straightforward. This is where things first started to go wrong.
Step 9 - Install the new brackets. Well, yes. These are the precision tools that I needed to use to driver's side bracket on - keep in mind is was the better of the two brackets...

For vehicle-specific brackets (which they need to be, to get the airbag approval), they're definitely not very well matched to what's on the car. This is the sort of thing I mean:


Still, it could be worse. Judicious use of the hammer, and a big flathead screwdriver appropriated as a pry bar saw all of the bolts bar one able to be fitted up. Despite my best intentions, there was just no way this was going to work:

There was also some questions about the top of the brackets. Because the base of the two studs is offset from the mounting face of the bracket, the new brackets end up on an angle vertically - they're "toed-in" at the bottom when you look at them from front on. this is the culprit:

The original metal bumper brackets have a bend in them to accommodate this change in level - the new brackets don't.
So I called it quits for the weekend here, and mulled over the problem for the next 24hrs.

SO - how to overcome these issues.
First up - the misaligned mounting hole. Out came my baby dremel rotary tool, and in went a grinding stone.

After a quick bit of massaging and plenty of sparks, the mounting hole had been ground out enough to allow the bolt to mate through to the nut on the chassis. Success!

A quick clean out , wipe down and spray with some cheap black spray paint ensures it won't rust out. Here's a free tip - don't clean out a hole you've just been grinding with your bare finger - there's a lot of sharp thin shards of metal that easily embed into soft flesh. Funny story.
Now, what to do about the brackets and the fact that they're not flat? Well, what we did (and I'm not saying it's right, just what we did) was to mount up the bullbar onto the brackets as they were. We bolted the bullbar on, and did everything up rather loosely.
To get the bar on with just the two of us, we used the bottle jack out of the car. The bar itself can be lifted onto the brackets, and will happily sit there. We then used the bottle jack to jack it up enough that the brackets would align, and we could loosely attach the bolts that hold it on.


Once it was on, and roughly aligned, we simply started doing up all the bolts, starting with the ones holding the bar to the new brackets. That pulled the bar across the car, and centred it against the centreline of the car nicely. Then, we simply cranked the bolts that hold the brackets onto the car as tight as they could go. This had the surprising effect of actually producing enough force to bend the 4mm thick steel brackets at the top, so that they conformed to the shape of the car in that area. I'm not sure if this is the recommended way of doing it, but it worked for us.
After a bit of mucking around, loosening off bolts, moving the bar in or out, left or right, re-tightening, repeating for the other side, etc, we got it to a stage where we were happy with it.
BEHOLD!!!

It's on!
The only trick here was to re-fit the centre grill BEFORE bolting the bar on - otherwise you won't be able to squeeze it down between the centre hoop and the front of the car. The only spot that annoys me is a small gap just below the indicator on each side:

Try as we might, that's the best we could get it. I'm sure I'll get over it. Because IT'S ON!!!


