Showing posts with label House. Show all posts

Sunday, August 2, 2009

Let there be Sound


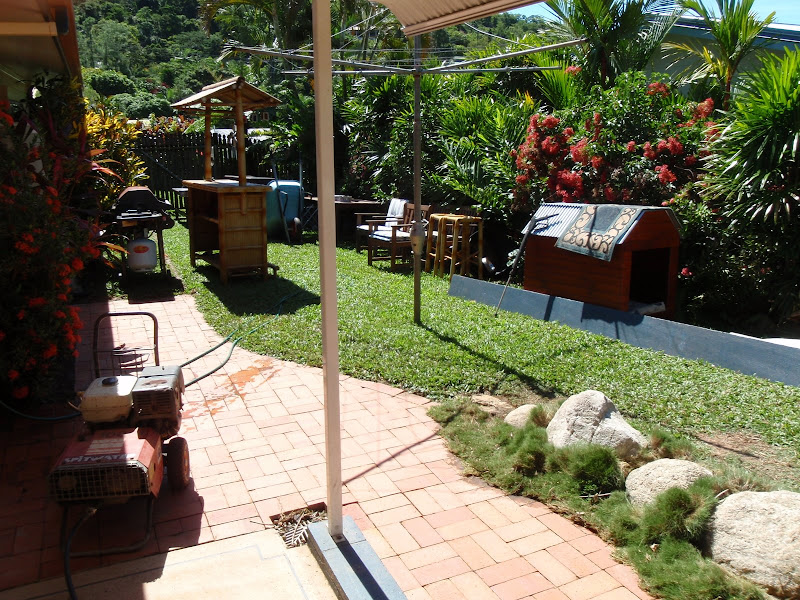
For a long time, we've wanted to put a pair of speakers out on the back patio. Up until now, our solution for getting sound outside is to simply crank the main speakers in the lounge. Whilst they're more than capable of this task, it does prove rather annoying if you need to go inside at all. With the party coming up, it was as good an excuse as we were likely to get to invest in a good setup.

A trip down to the friendly folks at Jaycar Electronics on Sunday saw us come away with a pair of outdoor speakers (decent quality - stinking heavy!), an impedence-matching speaker-selector switch, and metres of speakerwire that they chucked in for free. I like Jaycar - quality gear, but without paying for the brand names, and coupled with good service from people who actually know electronics.

Of course, spending the money was the easy bit. What followed was anything but. You see, our house has a very low pitched roof. VERY low. When I'm up in the ceiling, I can just sit up if I'm right in the centre of the roof, and even then I'm at risk of finding exactly where the roofing iron is with my noggin.Thus, for most of the ceiling you need to crawl along on your stomach. Complicating things even more is that when the back area of the house was added on, the rocket scientists have almost blocked off access to the back through the ceiling, except for one little hole that's just wide enough to get your shoulders through. Thankfully, in the past someone has had the sense to throw a plank of MDF board up there, which makes pulling yourself through considerably easier than it otherwise would be.

To add to all this, there's two other factors which impact on the joy of our ceiling space.
  • Number 1 is that whoever did the wiring in the house obviously was out to save money, as 240v wire is strewn from one end of the roof to the other, sometimes stretched tight to make it. They obviously couldn't afford an extra $5 of wire to give the extra length needed to bundle it all up and route it through the roof neatly. Where this causes most concern is when you are crawling backwards through the roof, and manage to get your feet tangled thoroughly in a 240v pull that, instead of laying nicely along the ground, is strung up at foot height.
  • Number 2 is that we have been know to house carpet snakes in our roof. I don't mind them, per se, but I still have a GOOD look with the torch whenever I get up there. Of course, where I needed to go was right where they have taken up residency in the past. They're not likely to bother you unless you actually tried to grab one, but between the lack of manoeuvrability space, and the likelihood of being tangled in 240v power wires, I wasn't likely to be able to move quickly even if I needed to. Hence, the comprehensive recce before committing!
Alas, we didn't have any resident reptiles this time, or at least any that I saw. After the last ones left I used a couple of cans of expanding foam to seal up the access into the ceiling space, more as a way to stop rats or mice getting in than the snakes. The snakes being the solution to our previous mouse issue.

After much banging about, swearing, banging, swearing, cutting, yanking and forcing, I had just about had enough. Thankfully Jess came home, and between the two of us we were able to get the speaker wires pulled through into the ceiling from behind the TV & stereo. Despite getting a coupe of metres more wire than we thought we'd need, it was only just long enough. But, "just long enough" is still long enough!


Mounting the speakers to the fascia was another one of those jobs that should have been easy, but ended up taking three times as long. Between drilling into the hardwood truss on the inside, trying to use oversized screws and wrecking the screw attachment for the drill, narrowly avoiding a 240v junction box that a previous owner had taped onto the inside of the truss, and so forth, the job consumed a couple of hours. But, in the end, both speakers are mounted nice and securely to one of the most-solid parts of the house. Always good when hanging weighty box-shaped objects up high on the side of a house in a cyclone-prone area.

Unfortunately, my bad luck with the drill continued when trying to drill a hole to pass the speaker wire through from the inside of the roof to the speaker. Except this time I had the opposite luck - I kept hitting the hardwood trusses instead of finding the space between them.


As such, my trusty tube of Selley's No More Gaps had to come to the rescue once again. Of course, now we face the dilemma of what to do with painting over the patches, since we don't have any of that lovely salmon colour paint. The house came with a couple of tins of paint, the salmon wasn't one of them.

Once the speakers were mounted and connected, we were able to test the system. Which is when we discovered that we were about 2m of wire short. So Jess made an emergency dash down to the dead-heads at WOW to pick some up. After arguing with the sales guy about which type of wire she wanted (I'd given her a cut-off of what we wanted, she'd found the same type on the spool, the guy insisted that she needed a different type), we were able to hook it all up through the selector switch.


And what a fancy piece of kit that is. Because our amp doesn't have an A+B set of speakers, we couldn't simply hook the new speakers up to the same amp. So this switch takes the front speaker output, and can then split it between 6 other pairs of speakers, all whilst ensuring that the impedance that the amp sees stays within it's normal ~8ohm range. If you don't understand any of that, think yourself lucky, and don't ask an electrician for an explanation.

The upshot is that we can have sound playing through the main speakers, and with the press of a button, pull in the outside speakers as well. We can turn off the inside speakers and direct all sound out onto the patio. Or we can turn all the speakers off if we wanted to! All the while, (because of the impedance matching) the volume stays the same.

But what a difference having the outside speakers makes! Now, with the main speakers at normal casual-listening volume, you can pull in the patio speakers and be at a comfortable listening level out there as well. Despite being a large open area, no extra volume is needed - the sound is crystal clear all around the patio area and up into the backyard, without being loud. It's just there.

So, all round, a resounding success. Something that we've wanted to do for ages, and it ends up being an even better result than we could have hoped for. We've still got a few little ends to tidy up with the system - paint the holes in the fascia, terminate the speaker wires inside on a nice blanking plate instead of just having wires emerge from a hole in the wall - things like that. But they can all come later. For now, we're just enjoying the music!


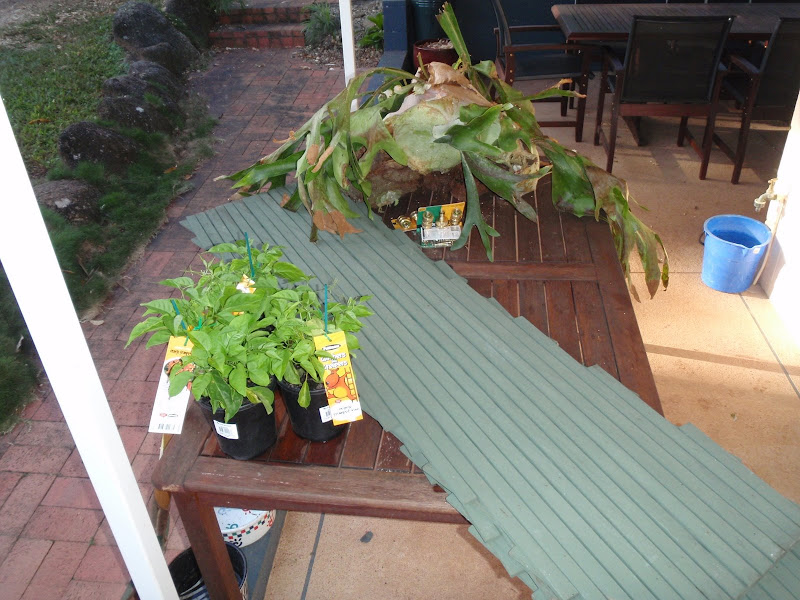
As a bonus, this little guy was sitting on the outdoor table when we were putting the speakers up:

Tuesday, July 7, 2009

Photo Update

Since I'm so lazy, you get the photos from the previous post all stuck in here. Plus, they're not even particularly good photos.

Enjoy then!

Way back when we removed the big tree from the side yard, we put up these lattice panels to grow some privacy-bringing vines on. We planted some Orange Trumpet Vine, with the promise that it would go great guns. As you can see, it hasn't done real well. What HAS done well is the cucumber vines that we planted only 4-odd weeks ago.


Despite getting watered pretty much every day, the trumpet vine isn't going so great. So much for restoring the lost privacy. The cucumber vines, however, are growing really well, and we've even got a couple of baby cucumbers starting to grow:


Where the big tree was, we've put down a lot of crusher dust, and made a nice smooth ramp from the side yard up to the back yard. Realistically, it could still do with some more dust to smooth out the bumps and high spots, but I figure we'll leave it until the grass gets established, then top dress it and fill in the low spots.


The grass is growing well, but it's taking longer than I'd like.


It's a bit patchy in spots, no doubt due to the fact that Badger finds the grass seed quite tasty, and that the crusher dust seems to be a fine place to bury a bone. So we often end up with "freshly tilled" patches, shall we say, and that's not good for the grass that was growing there. But some spots of it are coming up nice and thick and tall (over near the fence, say) - I just wish the rest of it would follow suit. It's certainly not for lack of water, since they whole area has been watered every night for the past month.

The grass on the flat section in the back yard is going well:


But there's a lot of weeds and other miscellaneous garbage growing amongst it. It needs a spray with my good weed-killer solution, but I'm afraid that it would kill the young grass as well. I'll give it a mow this week - hopefully that will take care of the higher/larger weeds, and give the grass a chance.


As you can see, the blue paint on the fence is holding up nicely, and as the grass start to encroach on the reclaimed dirt, the whole lot looks better and better.


We tackled this back corner a few weeks ago now, and turned what was jungle into a clean, if unimpressive and wasted corner space. But at least we can get in there now and keep it cleaned out. And not having 2 feet deep of rotting palm fronds on the ground makes it much more pleasant for everyone, Badger included.


Since this is eventually where my shed is going, I don't really care that it's currently wasted space - it doesn't really lend itself to anything, so we'll just keep it as clean and tidy as possible for now, and worry about what to do with it later.


All in all the backyard's looking a fair bit different than it did 6 months ago! Once the grass comes on and we manage to level out all the bumps and ditches in the yard, it'll be a much nicer place to spend time and easier to keep tidy. By having the car access into the back yard now, we can bring in ute-loads of mulch for the gardens, which will help to keep the weeds down.

The other big job from this weekend just gone was to sort out the fountain in the front yard. The base was full of rotten water, and the mozzie people were concerned that it was breeding dengue mozzies. Whether that was right or not, it still had to go, just because it was disgusting.

We pulled it all apart (after discovering it wasn't made out of styrofoam or hebel block, but actually cast concrete) with the help of a couple of litres of bleach to kill all the strange and gross "things" living in the permernantly-wet spots, and drained the tub by belting a hole in it with the fencing bar (best tool I've ever bought). A couple of hundred litres of black, stinking water drained out, and let us then remove the submersible pump and the besser-blocks that was supporting the structure.

After getting it all apart, we decided to re-assemble the top part of the fountain back in the garden, and just keep it as some garden art.


It doesn't look bad, and adds some interest to the garden. All that's left to do is shape the dirt around the base so that it won't collect water there, and to use some expanding foam to seal up the ex-fountain-outlets on the top of the concrete balls, so they don't fill up with rain in the wet season. The big tub base has been thoroughly washed (it still stinks), and is living around the side of the house until I can arrange to get it to the dump.


We salvaged the besser blocks (no, we didn't just leave them in the front garden like that!), and after being thoroughly washed down and left in the sun to dry, they'll come in handy some other day.


Now, all we need to do is get a spare weekend to clean out the remainder of the front garden, and make it all presentable, and we'll be laughing. Maybe in late September, at this rate...

Thursday, May 21, 2009

Renovating Tip #74 - Fresh Paint Fixes Everything

Following on from this:


As of last weekend, we now have this:


Isn't it pretty! It's a removable hills hoist - the top folds down and you can pull it out of the ground, and hide it away. Helpful for:
A) cyclones, and
B) driving over it to get into the back yard.

I've also learnt that I'm only marginally better at concreting than I am at paving, and I suck pretty bad at paving. Still, with 5 x 10kg bags of concrete holding it in, it shouldn't be going anywhere any time soon. I'm a bit concerned with how plastic-y the new hoist is - doesn't really seem built to last. But considering that the old one was *completely* galvanised (even the crank handle), and even ran wire rope for the clothesline part, anything even slightly younger is probably going to use more modern materials in it's construction. Still, I'm not going to guess how old the old one is, and it still works perfectly...

The line itself is slightly smaller than the old one, which suits us fine. We didn't have that much space to put it in, so this size lets us keep it down the side near the laundry, but without cutting the garden back too badly so clothes don't snag on trees. It's the smallest one they make, in fact. It wasn't until the concrete was all set three days later that I realised that it might not be long enough along the sides for drying queen-sized bed sheets. I still don't know if it will be - I guess I'll find out on the weekend.

Also, on the weekend, we painted the back fence. It's still dangerously decrepit, but at least now it looks less hideous. As Stevie would say - "Good from Far, Far from Good".

What it used to look like:


What it now looks like:


$25 worth of fence paint well spent! We've obviously only painted till just behind the second palm tree - as we uncover more of the garden we'll paint the exposed fence as we go. Hey - I already said it wasn't a good job! We painted everything - the fence, the sheet of iron we attached 3 years ago to cover a large gaping hole, star pickets which hold the iron up, as well as other star pickets that hold the fence itself up - everything got a coat of Ironbark Blue. Trees near the fence and creepers growing on it simply got brushed aside for long enough to slap some paint underneath them, then they got moved back. It's hard to tell from my dodgy photo, but it's really made it so much nicer than it was.

Talking about fences - we've got a visitor for a couple of days:


Max is up staying with us while Trev & Kelli get a new fence put it along the back of their place. Badger's kinda ready for him to go home already though. They mostly get on well, except if there's food involved. Max doesn't particularly want to eat the food, but he'll be damned if he lets Badger eat any. Meal times usually involve dragging each dog to opposite ends of the patio to feed them (something which confuses Badger greatly, as he's a little OCD about where he should have his dinner), and then standing guard in the middle. It's good fun. That said, he's no problem to have, and it's nice to be able to repay our dog-sitting debt, after BAdger has spent so long living at their place every time we're away.

Monday, May 11, 2009

Garden Attack!!!


This weekend saw the latest instalment in the popular and exciting not-made-for-TV series Garden Attack!!!. Today's episode focuses on our backyard, where, bucking popular trends, we didn't install a water feature or a dry creek bed. Crazy, I know.

What we did do was cut the garden back by about 2m. The original gardens were around 4m deep at their narrowest point, and well overgrown. By cutting them back we'll gain more lawn area, and be able to keep the actual garden beds clear of junk (fallen palm fronds, dead trees, etc). Another good benefit from reducing the size of this garden is that eventually we'll gain vehicle access into the back yard. Which has the knock-on effects of making gardening easier, as we can load the crap straight onto the ute, as well as keeping the gardens easier to maintain, since we can dump a load of mulch straight off the ute and into the garden beds.

Here's a dodgy photo stolen from when we had the trees removed. You can see how deep the gardens were, and you can't see the (extremely dodgy) back fence at all:


You can clearly see here how far we chopped it back - the dirt/grass edge used to be the edge of the garden:


As you can see from the "Before" photo above, the garden was really quite thick and overgrown. All in all, we took two very-well-loaded ute loads to the dump. Some nice plants unfortunately had to go, we now have the opportunity to plant the gardens up how we want them. As as previously mentioned, the ability to dump mulch onto the gardens should keep them looking nice.

We still have a bit of work to do with this side garden - there's a couple more golden cane palms that I want to chop down before they get much bigger, and there's a medium sized fishtail palm in there as well that needs to go - this is what they look like when they get big, and then they cost heaps to get cut down (as we learnt two months ago):


You can see the stump that that big tree left on the far right-hand side of this photo, and the medium-sized fishtail on the left:


With those bigger palms gone, however, the maintenance of the yard will be so much easier, and we won't be constantly taking old rotten palm fronds to the dump. Part of the impetus for doing this work was a notice we had left in our mailbox from the Dengue Patrol people advising us that we had water collecting in palm fronds out the back, and that we needed to clean it up before they came back.

For those who don't know, Cairns had a very bad season this summer for Dengue Fever. It's quite a debilitating disease, and if you catch it twice, you're at high risk of it developing to Haemorrhagic Fever, which really is just as nasty as it sounds. People can, and do, die from it, often quite quickly. Dengue itself is pretty nasty, and is one of those things that you don't completely recover from for a number of years.

Dengue is spread my Dengue mosquitoes - a special breed of mozzie that carries the disease. They're different to normal mozzies, smaller, only come out at night, hide in dark places, etc. But they can also breed in very small amounts of water - smaller than what normal mozzies would use. So an old palm frond laying on the ground can hold enough water for them to breed in - obviously not something you want around your house.

Because of the seriousness of this year's outbreak, the council formed a special Dengue Patrol unit, which went around inspecting people's yards for potential breeding grounds. They had the power to fine you big dollars if they thought the situation warranted it. In practice, only a handful of people were fined, and that was for persistently ignoring their requests. But still, if you had your house inspected (like we did), it was still in your best interests to heed their warning. In the past we've just left the back gardens as a jungle, since it gives good privacy from the neighbours, but it's now time to clean them out.

Unfortunately one side effect of cutting the garden back as aggressively as we did is that you now have a clear view of our back fence. The back fence was a point of contention when we bought the house - we wanted the current owners to replace it before we bought it, and they didn't want to. I suspect it's made out of asbestos fibro sheeting, and it's really not in a good way. It's busted up, cracked, and generally falling down. You can see in the above photos the sheet of second-hand corrugated iron that Trev and I bought when we fist moved in and screwed to the fence to cover a large hole and keep Badger in our yard. The rest of the fence is being held up by a combination of star pickets, fencing wire, cable ties and concentration.

That said, we actually have the good end of the deal. For years now it's been hidden behind a thick garden, so we haven't had to look at it. But for our back neighbours who share this fence, this fence is part of their pool fence. So when you're in their pool area, lounging around, you have an uninterrupted view of this dodgy old fence, complete with "windows" of shiny corrugated iron peeking through. It must be a good look. Last year the new owners of that house dropped a note in our mailbox saying they wanted to get it replaced ASAP with a nice new colourbond fence, and would we pay half. We gleefully accepted, and told them to get some quotes and we'd go ahead ASAP as well. We've not heard from them since. Which hasn't been a problem, until now.

In the meantime, I'm probably going to give the fibro a quick and dodgy coat of paint, so at least it's mainly one colour, and will blend in and disappear a bit. But I think the long term solution will be to talk to the neighbours again, and see if they're still keen to replace it, and have it swapped out for a nice new presentable fence (that's not going to give us all Mesothelioma).

One unexpected side effect of being able to see the fence, however, is that it's made our back yard appear to be very small. Before, the yard looked huge. You knew there was a fence, but it was way back there somewhere - behind all that garden. Now that you can see the fence, despite the additional area we've uncovered, the yard looks quite small. It's an interested effect, and one that we really didn't expect. Hopefully as we fill in the garden with plants and paint the fence, it won't be as noticeable.

Our plan is to work our way around the back yard, slowly cutting all the gardens back and clearing them out, and eventually we'll be left with some pretty, easy to maintain and safe gardens. As we go we're going to be dropping some of the bigger trees and palms before they get too big for us to handle, as well as taking the top out of some of the bigger trees that are starting to just get too big. Hopefully it'll all look good at the end of it!

One job that has been on our list is to remove the existing clothes line. It's right smack-bang in the centre of the side yard, which is great for it, but means that we can't drive a car up there. Which is the whole point of all of this! We want to replace it with a lift-out-able hoist, so that when we need access we can simply pull the hoist out of the ground and drive over it. Best of both worlds!

After taking the second load of rubbish to the dump yesterday, Trev jokingly asked "any more jobs you want me to do?". So I jokingly answered "well, you could always pull out that clothes line if you were desperate!". So before you know it, we had the crowbar and pick out, and were digging it out. We also found a block of cement right next to it where the clothesline had previously been - it had been cut off with an angle grinder, and re-positioned to where it is now! After digging around for 10 minutes and still not getting it to budge, the 4WD was called into action. A length of rope and some low-range action later, and this is what we'd achieved:


(Note the Safety Chair positioned over the hole!)

So I guess now we need to:
1) get rid of the clothesline somehow? Keep it somewhere in case it comes in handy later on?
2) buy new clothesline
3) decide where we want it, and
4) dig a new hole and cement new clothesline in.

Sounds like fun, eh???!!! Stay tuned for next week's episode where we try and use a 4WD for more inappropriate things! Will we actually manage to put the clothesline through the radiator next time? Tune in to find out!!!

Wednesday, May 6, 2009

Just call me Mario


So we arrived home tonight to find water all over our back patio. Again.

The culprit this time was the tap at the back corner of the patio, which is conveniently located above Badger's water bucket (and about 3 feet from the new hole in our paving). For some reason, it's picked right now as a good time to start leaking. Has never leaked before. It had spent all day running, had filled up the bucket, then continued to flood out over the patio.

So - off went the water, and out came the plumbing tools again. At least I knew where they all were without needing to look.


At least this was an easy repair. A quick valve seat grind, a new valve and washers, and the tap is back to working like a brand new one again.

But it's starting to make me nervous as to whether we're going to find something else broken every night this week? At least so far all our water issues have been outside...

(And for those playing at home who are still confused about the title, click here for a hint)

Tuesday, May 5, 2009

Water, water, everywhere...


What have we here?

A week ago, Trev bought up the big petrol-powered pressure cleaner with the walk-behind disc cleaner, and we cleaned up all the concrete and paving around the house. Since then, we've had some intermittent water under the hose reel outside the laundry. No big deal - we used a lot of water when we were cleaning, so it's not out of the question for the pavers to still be a bit soggy. I noticed it again on Thursday night when I was watering the garden - the area looked to be wet, but on the other hand that hose reel leaks a fair bit (due to our abnormally high water pressure), so it's not uncommon to get water dripping there.

On Friday afternoon, however, my curiosity had got the better of me. When I went out to have a look, I found the adjacent garden full of water, and looking closer, you could see water bubbling up between the pavers.


uh oh.

So out came the tools, and up came the pavers. The more we dug, the worse it got...


Soon we had our own little fountain...


Resigning ourselves to the fact that it probably wasn't going to magically stop by itself, we resorted to turning the water off to the house at the mains valve. At least we could now excavate the area without splashing gunk everywhere.


The problem turned out to be a cracked fitting. In the top-left of the assembly shown above, there is a white PVC T-junction, that has a screw-on fitting on it's left, where the hard copper line attaches. That screw fitting is cracked along it's length. So that's our culprit. Being right outside the washing machine, it's possible that the crack has been caused by the high water pressure, and the washing machine's filling valves opening and closing quickly, causing large backpressure in the lines right outside.

Whatever caused it, we needed to fix it. After looking at it for a while, we decided that we didn't have the tools, or the parts to attempt to fix it ourselves. So we needed outside help.

It was now late on Friday night before a long weekend (Labor day on Monday was a public holiday), and we were scheduled to go camping all weekend. After weighing up the pros and cons, we decided to fill the bath with water (so we had a small reservoir for flushing of toilets and washing of hands), then turn the house off at the mains and go away for the weekend. We didn't like our chances of finding a plumber on a long weekend who wouldn't charge an arm and a leg, and after all, we weren't going to be home anyway.

After getting back on Monday, we phoned a local plumber and left a message detailing the problem and our contact details. We called from Trev & Kelli's place, where we'd gone to have a shower. He called at 10 to 7 on Tuesday morning, and said he'd come straight around to look at it. We showed him the situation, explained what we'd done, then went off to work. We arrived back that evening to find the fitting patched up, and the mains water turned back on.


Note the larger plastic sleeve on the LHS of the t-junction, complete with new plastic screw fitting. Best of all, no leaks! We made sure the hot water system was full, and then could enjoy the luxury of having running water inside our house again.

I even pulled the toilet apart, and have stopped it's running problem (for now). Following on from the last toilet post, the problem had resurfaced again as anticipated, although not as bad this time. Investigation showed that it was actually running because the cistern was filling up too high, and overflowing down the centre of the flush mechanism. After adjusting the float level back down, the toilet now fills, stops, and doesn't run any more! I fear that the aforementioned water pressure is to blame here as well, and it is forcing water into the tank with more pressure than the cistern float can exert on the valve to close it. It's fixed for now, but I fear the pressure is forcing the float arm to bend, so anticipate it to come back. But for now, we have a perfect toilet again!

Our next project, then, will involve this:


That's our mains connection, with the tap valve and water meter. We need to install a pressure limiting valve to the left of the meter here, so that the water pressure inside the house doesn't exceed the 500kpa that's outlined in the building code. Without this, I fear we'll continue to blow pipes, as well as damaging washing machines, dishwashers, toilets, etc. Plus, as it currently stands, the pressure is sufficient to blow outside hoses off their tap fittings, and to wreck the internals of spray nozzles and such. It's a certainty that if you go out to water the garden you'll have water spray out from the hose-to-nozzle connection all over you, and then the connection will blow off the hose, or the nozzle itself will blow apart. It's really quite wicked.

I've been given advice as to what pressure limiting valve would be best, so we need to work out whether it's something we can DIY ourselves, or whether we'll need to call a pro in. We'll wait and see how much the plumber charges for the repair above, and if it's reasonable, we'll probably just call him out again and get him to do it.

Oh, and while we were taking the photo of the mains connection above, Jess noticed that there's a considerable drip from the mains valve where the tap enters the body (you can see the water trail on it in the photo above). It's on council's side of the meter, so we're not paying for it, but we'll need to call them up and let them know to come and fix it.

It never ends!

Thursday, April 30, 2009

The new toilet's crap.

You may recall that I mentioned in passing a couple of weeks ago that we'd finally replaced our dodgy old toilet cistern with a brand new one, and how it had changed our life. The old one would run constantly, wouldn't flush, wash old, yellow-y and just generally crappy, so to speak. When we put the new one in, there was much rejoicing. It flushed, and then stopped flushing. It didn't leak or run constantly. It was a 2m x 2m box of heaven on earth.

So imagine my disgust when the new toilet started to run into the bowl. Not much at first, but eventually getting up to an audible trickle at night times. I thought we just fixed that? And thanks to the very old and perished rubber coupling where the cistern meets the pan (that I didn't replace with the new cistern, but knew at the time that I should), every time you flush, you get a couple of drips of (thankfully) fresh water trickle out the back, as the rubber has cracked.

As annoying as that was, I refused to look at it. It was a brand new toilet, it could bloody well fix itself for all I cared. It had been doing that for about 2 weeks, until...

...

... we came out yesterday morning, to find the toilet room flooded out. Not only was it now running into the cistern constantly (again), it had developed an external leak somehow, and was dripping water out onto the floor. It hadn't been doing it the day before, so something must have let go over night.

So we turned off the water, flushed it all dry, mopped up the water as best we could, and left for work. Last night, I pulled it all apart again, and think I've found the problem.

You see, when I put the new cistern on the wall, it's mounting points were wider than the old cistern. No worries - I could measure how much wider it was, so I simply centered the new cistern against the old one (so the outlet lined up nicely), and mounted it there. The issue, however, is that the old cistern was never centered on the wall. It was slightly offset - so the new one was also offset exactly the same amount.

So last night I re-measured everything, and centred the cistern on the wall. I previously had checked that the bowl was centered in the room (it was), so with everything centered and measured, it should all line up, and there should be no twisting forces applied to any of the joins. Therefore, seals should be able to seal, joins can join, and water should stay inside.

Certainly with the cistern centered on the wall, the toilet seat lines up a lot better, and isn't needing to be jammed in one particular spot any more.

But what I had failed to notice when doing my measuring was that whilst the bowl itself was centered in the room, it wasn't square. It's set on an angle. Which is why the old cistern was offset slightly - the flush outlet tub from the cistern needs to come out from the wall at an angle - not at 90-degrees. So basically now the cistern doesn't line up with the inlet to the bowl, because some dodgy Fred-in-a-shed home handyman plumber couldn't be bothered to get the bloody toilet bowl centred and square before bolting it to the concrete, and (here's the kicker) then tiling around it.

So I don't know what to do now. I've put it all back together with the cistern in the new (centred) spot, and it's not leaking externally, which is nice. It's not running internally either at the moment, but I expect that to develop like it did last time. I'm going to need to replace the rubber coupling sooner rather than later, but short of replacing the pan and then re-tiling the toilet area, I'm not sure what the next step actually is.

Bummer, eh?

Tuesday, April 28, 2009

Under Pressure


Last weekend, Trev bought up the big petrol-powered pressure cleaner, and the big walk-behind cleaner. It's a beast of a machine, and makes mince-meat of cleaning concrete and pavers. It had been two years since we had last pressure-cleaned our patio and garage, so was well overdue.

With the wet season up here, any exposed concrete in the sun quickly has a layer of black slimy moss/mould grow on it, and it can get quite slippery. Plus, it just looks bad. So the driveway and the pavers at the back really needed a clean. The carport and patio area don't get the mould on them (due to the "pavecrete" coating, as well as lack of sun), but they do get a lot of dirt and mud tracked in on them during summer, and over time they look dirtier and dirtier. You can clean them off with a hose and a scrubbing brush, but it's a lot of effort, and it doesn't get as good a finish as the pressure cleaner. Not to mention that the pressure cleaner is a lot more environmentally friendly compared to using soap or chlorine to clean the concrete and mould, which runs straight into the stormwater drain, and into the creek across the road.

So, once we'd moved all of the outdoor furniture off the patio...


... it was time to get stuck in. The big walk behind disc cleaner makes the job so much easier and quicker. We still need the high pressure lance to do the edges, as well as any fiddly bits (the big rocks around the garden edges, the paved steps, etc) - you've just got to be very careful when using it, as it would pull skin off any errant feet quicker than you could say "ow - my feet!". It's so powerful that you have to even be very careful with it on the pavecrete coating on the concrete - too close, and the pressure will blast it clean off the concrete.


Badger thought the whole process was wonderful, especially being able to bark at the petrol engine on the pressure cleaner whenever it was started. Of course, he was just thinking of when we had finished, how he was going to find the biggest pool of mud he could, then track it straight back onto the concrete...

The process is not helped by whoever did the concreting at our place. The back patio (as shown above) doesn't drain to the far corners, as you'd expect. It drains towards the back sliding door of the house. Then, from there, down to the BBQ area. However, once down into the BBQ area, it doesn't drain towards the drain - no - it drains back against the drop off, and pools there. Same in the carport. Instead of sloping down from the back of the carport and out the driveway, it actually drains from the front back towards the inside back corner, where it pools against the house. There's even a handy little lip at the front of the carport to prevent it from being able to run forward and out, and frustrates you when you're trying to broom/squeegy it that way.

Whoever set up the concrete and screed it deserves to be shot. If they had taken an extra 2 minutes to set the slope of the slabs in such a way as to drain water in the appropriate directions (and lets face it - we do get a fair bit of water up here every now and then), then cleaning these areas would be a joy and a breeze. But because they didn't, this job is always a royal pain. Not to mention the potential damage to the house from draining water towards it and holding it there. To fix it however, we would need to jackhammer up the existing concrete slabs and have them re-laid with the slope in the right directions - a job that would be so prohibitively expensive as to render it not economically practical. The carport I'm not too worried about - that's where my ensuite and an extra bedroom are going in my Future Plans(tm). But that back patio makes me cringe whenever I think about it.

The joys of buying a second hand house, and needing to live with other people's shortcuts! At least we now have beautifully clean and sparkly concrete and paving. It really does look a lot better. And with the trees down the side gone, it will be much easier to keep this way now.

Tuesday, April 7, 2009

TIIIIIIIIIIIMBERRRRRRRRR!!!!

Since we've moved into our house here in Cairns, it seems that all we've done is pay good money to get less stuff. And the trend continues!

We had a couple of trees in the back yard that were starting to become an issue. The one down the side, overhanging the patio:


And the three big (BIIIIG!!!) fishtail palms against the back fence:


The side-tree had a few problems:
  • It would drop leaves 12 months of the year. An inordinate amount of leaves. Said dead leaves were constantly accumulating in our back patio area, requiring weekly clean-outs with the blowervac.
  • It would drop seed pods pretty much year round, which really hurt when you stood on them on the back patio area (where 90% of them would inevitably end up)
  • It would drop sticks and branches pretty much year round, which was just annoying.
  • It was right smack-bang in the centre of my planned driveway into the back yard.
  • It was rotting from the inside out. The roots were all rotted and hollow, as were the main load-bearing branches. At one point I turned around and staked my crowbar into the ground, and it disappeared down about 2", where it had struck into a decaying root and just kept going.
  • Nothing would grow around it, especially grass.
Which is a shame, since it was a nice enough tree, and provided plenty of shade. But it had to go.

As for the fishtale palms, they were just huge.


They had massive seed-pods hanging from them, which would drop seeds and fruit all over the back lawn, which quickly became like shotgun pellets to your shins whenever mowing was required (IE, every week in summer). Due to the sheer size of them, they were starting to concern us. Despite being right on the back fence, if they were to fall towards the house, they would be able to crash through the back patio no worries at all. And the weight of them would ensure that there wouldn't be much left afterwards. Heck - even one of the fronds that has died and falled to the ground is difficult to drag out to the front, and takes up pretty much the entire garden bag once chopped up!

Before we could get the tree loppers in though, we had some work to do.


The garden down that side was set up to continue up to the base of the tree, as you can see above. Inside the garden was a bit of a mess of ginger plants (really pretty flowers, and as hardy as anything, but a little dishevelled to look at), and further up (behind the tree in that shot) was what we think used to be a cubby-house. 4 coppers logs set in concrete, with left-over pavers set underneath. All of this would need to be cleared before the men arrived, as they couldn't be working with garden and rocks in their way, and their stump grinder wouldn't take kindly to munching on concrete blocks!


The ginger was easily cleared out. We had sprayed it with roundup the week prior, so hopefully we won't have to deal with much regrowth in what will now be lawn. The paving and coppers logs proved both harder and easier than we had thought. The pavers were difficult because they had a layer of crap over them. Weeds growing through, old palm fronds that Badger had dragged out of the garden and left there, dropped leaves and sticks from the tree - it was all just sitting on top of the worlds dodgiest paving job. We had borrowed the ute for the day, so I set about breaking the pavers out and digging them out, and throwing them behind me on the lawn. Jess picked them up and threw the broken dodgy ones into the ute, and kept a stack of reasonably good ones for a future project.


All going good, until we'd finished getting all the pavers out.

And discovered that there was a second layer underneath that, and this layer consisted of house bricks. Where THEY came from, I've no idea. Our house is constructed from besser blocks, not bricks, so they definitely weren't left over from that. Somewhere in our neighbourhood is a house that's missing half it's wall.

So just as we thought we were finished, we realised that we were only half way through, and that the half we had done was considerably easier (and half the weight) of what was still to come. By the end of the day though, we had them all dug up, and with the ute resting on it's bumpstops, we took a trip to the dump and thoroughly confused the dump attendant. Of course, we then had the privilege of unloading the ute by hand into the "Building Rubble" section - what I would've given for a tipper tray that day.

Once the garden area was cleared, we were able to move the rocks that form the garden edge back towards the fence to allow for a good width for vehicle access. The 2 shrubs against the fence were cut right back to ensure they don't crowd over the new driveway and encroach into the new space. Hopefully they'll bush up again quickly.


This only left the coppers logs. We decided early on that we would probably leave the two that were set against the fence, since they're not in anyone's way, and the less digging and mucking about the better. The fist log (the one closest to the tree) was difficult to get at with tree roots and such in the way. We finally had a breakthrough when we realised that the log itself was moving slightly within the concrete. A couple of sharp hits to the concrete with the breaker bar, and it shattered into three or four pieces! The log then lifted straight out, and the individual pieces of concrete would then be lifted out one at a time. Thank goodness for whoever did the dodgy concreting job originally!!!

The second log was much the same story, except after breaking the concrete away, the coppers log actually snapped off down at the base of the hole, where a small amount of solid concrete remained. I was happy enough, so we just removed as much concrete as possible, and will bury the remaining piece for someone to dig up and puzzle over in the distant future.


So after three weeks of manual labour every night and weekend, we were finally ready for the big day, which was yesterday (Monday the 6th).

They arrived just after 7:30, and got straight into it. We left 20 mins later, just as they had backed their chipper and truck through our front fence. Whoops. They know we know, 'cause we were standing right there when it happened, so will be interesting to see if they give us a discount on the bill because of it. It's OK - they pushed the broken pailings back into place, and wedged the corner post up with a brick. But the pailing are still broken and will need to be replaced, and now the gate is even harder to close than it was before, so it's all a bit annoying.

Upone arriving home, this is the sight that greeted us:


It's, um, much more open! We were expecting it to look a little bare and a little exposed, but nothing like this! We've regained so much space down the side of the house, and with the fishtales gone, it's really highlighted how large some of the other trees in the backyard are. For instance, the row of palms in the photo above were always considered to be pretty small. Looking at them now, the smallest one is about 5m tall, and they go up from there! So will be some more action here in the near future, since if we leave them too much longer they'll be too big for us to handle ourselves, and we'll need to call in the experts again.

All in all we're very happy with how it's turned out. We've got more work ahead of us - we've got to clean up all the woodchip from the stump grinding, and then get more crusher dust to level it all out and provide a nice ramp for the vehicle access. The the garden behind it will need to be cut back to provide access, and cleaned up since you can see it clearly now! All in good time though.

For now, we ducked down to Bunnings and picked up some lattice that we're going to attach to the fence, and some creepers to grow up over them. Hopefully this will give us back some of our privacy on our back patio now that the shrubs have been cut back and the tree removed.


The creeper is Orange Trumpet Vine which should be quite pretty when it's flowering, is nice and bushy, and relatively fast growing, yet not too adventerous and will stay relatively confined to it's bit of garden. Eventually this section of fence will need to be replaced with nice new colourbond panels, as it's pretty wobbly as it is, but this should tide us over until such time as funds are available for that.

Check back later in the week - we hope to have the lattice panels up and the creepers planted!